Seeing the world through the lens of a camera!


Tuesday, April 27, 2010

Sunshine Award

Hey Ladies! I want to THANK the Beautiful and so very Talented Darien for passing the Sunshine Award to me!! Thank you so much Darien, you are such a good friend!!


These are the rules of the Sunshine Award:

1. Put the Sunshine Award on your blog and/or within your post.

2.Pass the award to 12 other Bloggers.

3.Link the nominees within your post.

4. Let them know they recieved this award by leaving a comment on their blog.

5. Share the love and link to the person from whom you recieved the award.

Here are the 12 lovely ladies that I would like to pass the to : Lidia (thank you so much for all your help on my blog!) , Melinda, Lisa(I can't find your blog), Amanda Sevall, Sarah, Melissa, Vicky, Thanks to you nine ladies for being my first followers! I would also like to pass the award to , Wendy (thanks for inspiring me to start a blog). Heather, Luzma, Heidi. Im also giving it back to Darien, because she is just Awesome and deserves it. Darien, you dont have to send it back to 12. I just wanted you to know how much I appreciate you!


You ladies are also so great!

Saturday, April 17, 2010

Bloom! with ribbon rose tutorial

Description: My dd on Easter day! Stopping to smell the flowers!

I made the ribbon roses and the beaded yellow flowers on the fence. I struggled with them stems of the flower and finally decided not to do stems. I hand cut the sun and added buttons. I did lots of doodling to bring it all together.

Keep reading for a tutorial on the ribbon roses. Bear with me though, this is my first one!
Thanks so much for looking.
This is a close up of the ribbon rose we will be making.
It is very simple and I will try to explain it well. The pictures that I have taken hopefully will help out quite a bit.
The supplies that you need are:***35 in of a two sided ribbon (silk ribbons work best because they are less stiff. ***1 piece of embroidery floss or any strong thread. It needs to be close to the same color as the ribbon.***A craft needle with a large enough eye to thread the ribbon through.***scotch tape *** eyelet punch (i use 1/8in for center and 1/16 for outer holes.


You begin by drawing a circle on the back of a piece of cardstock. I use green so that when you cut it off it will look like leaves. The circle will be approx. 1 1/2 in across. I use a lid to trace. Punch a hole in the middle of the circle with the 1/8in punch; then punch 5 holes around the outline of the circle with the 1/16 in punch. Holes have to be small so they are'nt seen at the end..

After the holes are punched sew a five pointed star with the floss. Make sure the star is on the front of the paper and you can't see the circle that you drew. (the circle was only to keep even spacing from the center.) Tape the ends of floss on the back.
Don't tie knots, this will keep it from being bulky on the back when it is finished. Thread the ribbon in a large eyed needle. Dont tie the ribbon at the end; just pull it through about 1/2 inch. If you tie it, it will be hard to get the knot through the hole!
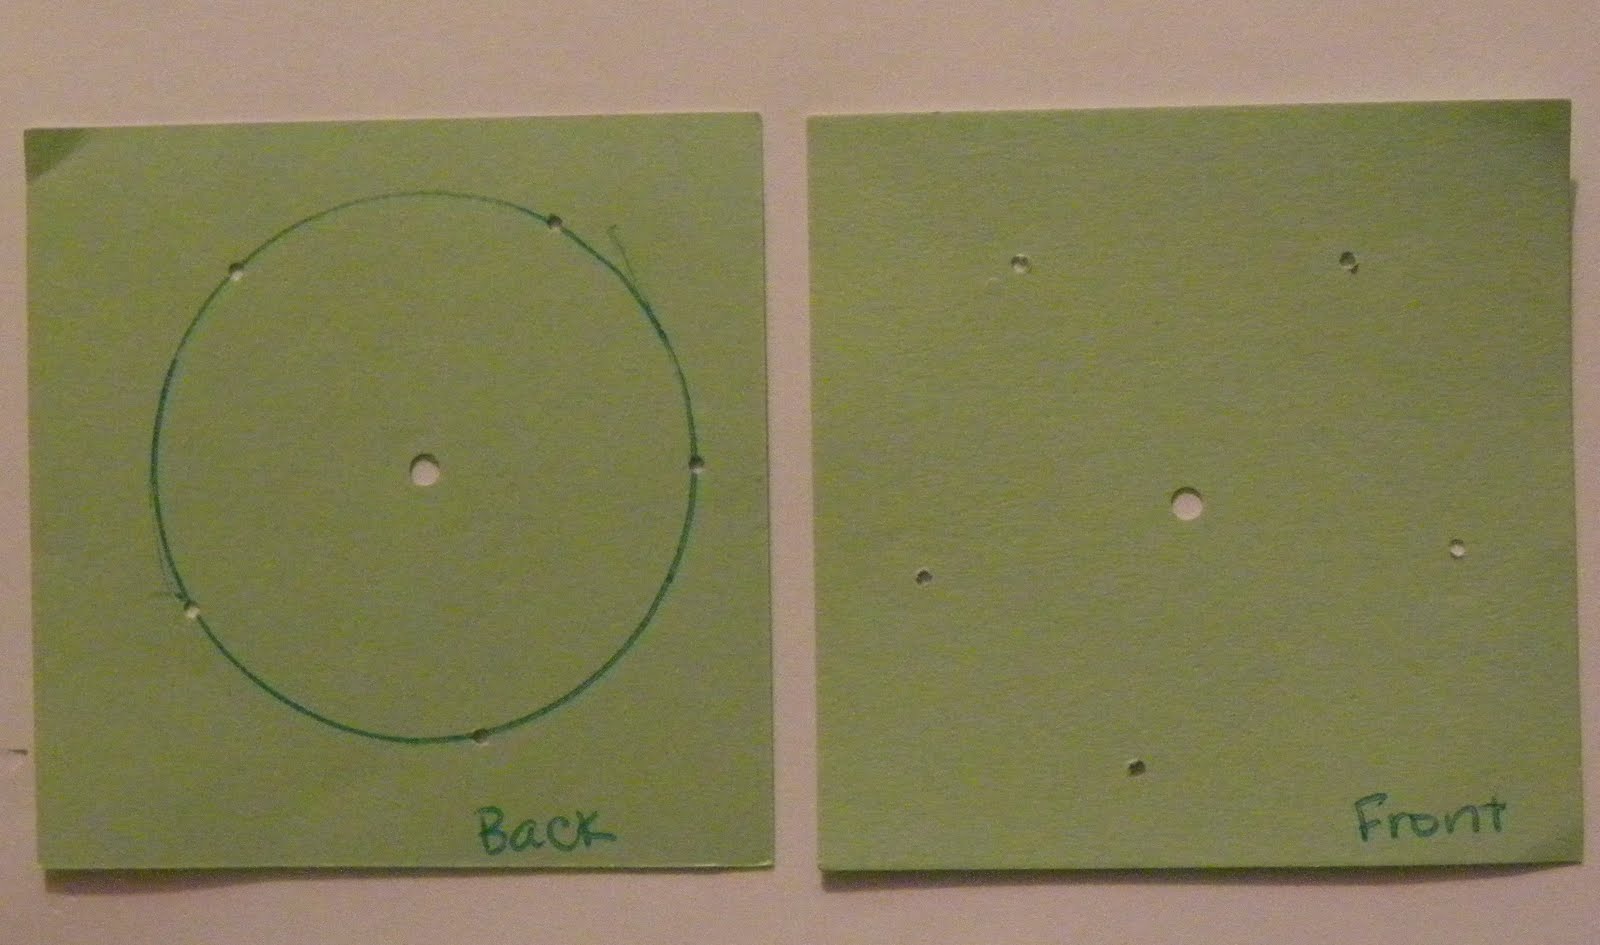
Bring the ribbon up through the center hole in the circle, careful not to catch the floss in your needle.
Again tape the ribbon in the back. Don't tie it, due to bulk!!


Thread the ribbon over the first arm of the star and under the next arm.
It does matter where you start.
Continue threading the ribbon over and under every arm, starting in the center and working you way all the way out to the edge.
Note: Let the ribbon curl up, don't try to keep it straight. This is what gives it the rose petal effect.
Note: Dont pull the ribbon too tight, it needs to be a little loose to have the fullness of a rose.


Once you have weaved it over and under all the way to the edge, and the holes are covered, pierce the needle through the paper. Go up under the rose to hide the end. Pull the ribbon all the way through to the back. (you have to pull firm and work it through the paper. The paper will probably tear a little, thats ok. It will be hidden.) Tape it off and you are almost done.
Now you can trim it off the paper. You can cut it around the rose with scalloped scissors or cut it off where you can only see little tips of paper at each point of the star. ***Careful not to snip the treads at the points of the star!!
You can also sew this directly on to your layout, if you are brave :). I have done it once, but I like being able to move them around if I want. Secure with a few small glue dots!
VIOLA!! You are FINISHED!! CONGRATS on making a beautiful ribbon rose!
Hope this was easy to understand. It really is easy to do once you get the hang of it. If you have any questions, please let me know. I would love to hear from you! Tab

Wednesday, April 14, 2010

Tabbilwilex's Gallery: What a day for a daydream

Tabbilwilex's Gallery: What a day for a daydream

This is a another lo of my dd. I stiched the clouds and butterfly trails with embroidery floss. I litely drew them out in pencil first then erased them after I stitched it in. I also tore and inked the edges of the white background to soften it up. Thanks so much for looking.

Tuesday, April 13, 2010

First Post

Hello Everyone! Thanks for visiting my blog! This is where I will display my scrapping ideas and tutorial for the embellishments I make! Im so NOT computer savy, so hang in there with me, I assure you it will get better!!